
TL;DR:
- Proper equipment calibration, process consistency, and quality habits are key to successful DTF printing.
- Maintaining optimal heat press temperature at 170°C for 10 seconds is crucial for transfer quality.
- Standardized workflows and routine quality checks prevent costly rejects and improve profit margins.
Wasted film, rejected prints, and inconsistent colors are more than frustrating — they eat directly into your margins. If you’ve ever pulled a batch of DTF transfers off the heat press only to find muddy blacks, peeling edges, or off-target colors, you already know how expensive trial-and-error can be. The good news is that most DTF production problems trace back to controllable variables: equipment settings, process sequence, and quality habits. This guide walks you through every critical stage of DTF optimization, from evaluating your current setup to maintaining airtight quality standards, so you can stop wasting materials and start producing prints you’re proud of.
Table of Contents
- Assessing your current DTF setup
- Step-by-step process optimization
- Solving common production issues
- Verifying and maintaining quality standards
- A practical take: Why process discipline beats expensive upgrades
- Optimize your DTF results with Transfer Kingz
- Frequently asked questions
Key Takeaways
| Point | Details |
|---|---|
| Assess setup first | Review your current DTF tools and workflow to find improvement opportunities before buying new equipment. |
| Standardize process steps | Following repeatable steps with the right settings ensures high-quality, consistent DTF prints. |
| Tackle common issues | Quick troubleshooting for problems like black loss and contamination boosts output and reduces waste. |
| Test and improve constantly | Regular quality checks and documentation drive better long-term results and customer satisfaction. |
Assessing your current DTF setup
Before you change anything, you need an honest picture of where your production process stands right now. Many small apparel businesses lose money not because their equipment is broken, but because it’s misconfigured or running on outdated assumptions. A thorough assessment is your foundation.
Core DTF equipment and materials to evaluate:
- DTF printer: Check nozzle condition, ink flow consistency, and head alignment. Clogged or misaligned heads cause banding, color shifts, and detail loss.
- Film: Are you using the right film thickness and coating for your ink set? Thin or low-quality film can cause adhesion failures during the hot peel or cold peel stage.
- Ink: Ink freshness, storage temperature, and compatibility with your printer model all matter. Old or improperly stored ink leads to dull, inconsistent output.
- Powder (hot-melt adhesive): Uneven powder application is one of the top causes of wash failures and poor bonding. Your powder shaker or manual process needs to coat the print evenly.
- Heat press: Platens that are uneven or worn produce hot spots and cold zones, leading to variable adhesion across a single transfer.
Understanding DTF industry standards gives you a reliable benchmark against which to measure every piece of your setup. Without a benchmark, you’re guessing.
| Setup element | What to check | Common issue |
|---|---|---|
| DTF printer | Nozzle check pattern, head alignment | Banding, color shift |
| Film | Coating quality, thickness | Poor ink adhesion |
| Ink | Age, storage, compatibility | Dull output, clogging |
| Hot-melt powder | Even application, freshness | Wash failure, weak bond |
| Heat press | Temperature accuracy, platen evenness | Inconsistent adhesion |
Research confirms that temperature is the dominant factor in DTF transfer quality — an optimal press setting of 170°C with a 10-second dwell time measurably minimizes color change, black loss, and contamination. If your heat press dial reads 170°C but your actual platen temperature differs, everything downstream suffers. Invest in an infrared thermometer to verify real temperatures.
Poor DTF ink quality is also one of the fastest ways to undermine an otherwise solid setup. Even a great printer produces weak results if ink viscosity, pigment load, or color profile is off.
Signs your setup needs adjustment include: faded whites after washing, visible banding in large solid color areas, powder that clumps or leaves bare patches, and transfers that partially lift during pressing.
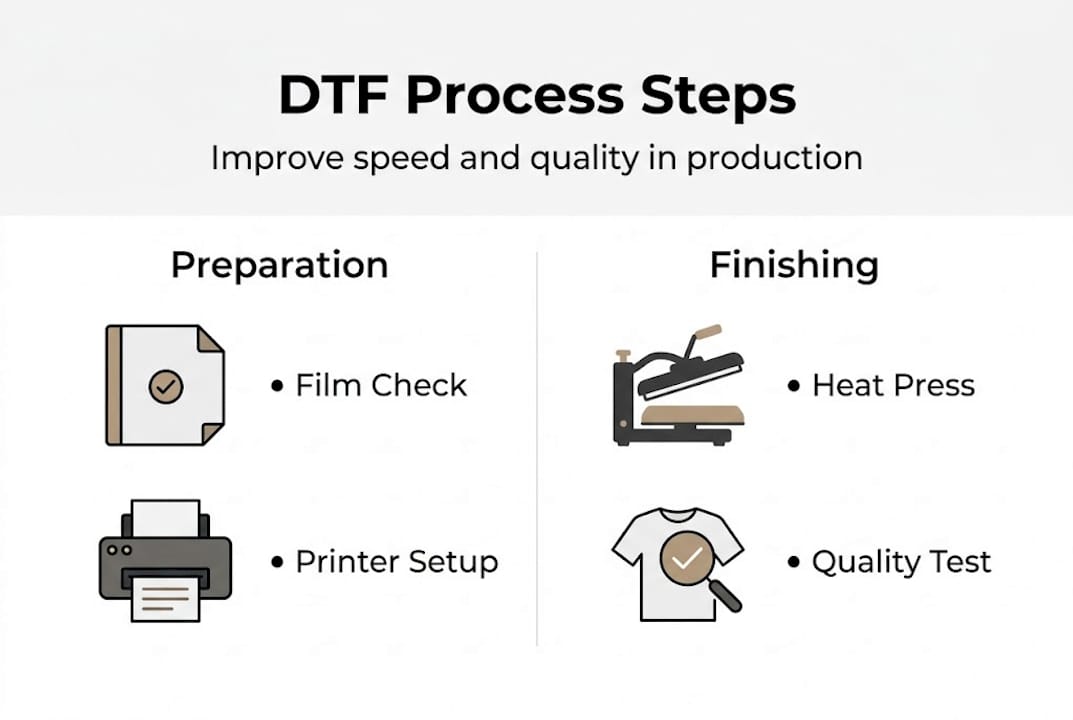
Step-by-step process optimization
Now that you’ve checked your tools and setup, the next phase is streamlining every step for consistency and speed. DTF printing is a multi-stage process, and weak links at any stage create rejects that cost you time and materials.
Follow these steps for a reliable DTF production sequence:
-
Artwork preparation: Export designs at a minimum of 300 DPI in PNG format with a transparent background. Undersize or low-resolution artwork creates pixelation on the film that no amount of press adjustment can fix. Use ICC color profiles matched to your ink set to keep output colors predictable.
-
Film selection: Match your film type to your print job. Hot-peel films allow faster production cycles because the transfer can be removed from the garment immediately after pressing. Cold-peel films give slightly higher detail retention on fine lines. Know which situation calls for which.
-
Printing: Print white ink as your base layer first, then lay the color layer on top. This order is non-negotiable in DTF — the white base is what makes colors pop on dark fabrics. Check your RIP software settings before every run to ensure the correct ink layering sequence.
-
Powdering: Apply hot-melt adhesive powder immediately after printing, before the ink dries. Even coating is everything here. Too much powder causes a plasticky hand feel; too little leads to wash failures. A dedicated powder shaker machine dramatically improves consistency over manual application.
-
Curing: Pass the powdered film through a curing oven or use a hover press to melt the adhesive evenly. Curing temperature and belt speed (or hover time) directly affect how well the adhesive bonds to the print. Undercured transfers peel. Overcured ones crack.
-
Pressing: Apply the cured transfer to the garment using consistent pressure, the correct temperature, and timed dwell. Research shows that 170°C and a 10-second dwell are optimal for minimizing color change, black loss, and contamination across a range of fabric types.
Using a DTF transfer quality checklist at each stage keeps your team accountable and catches problems before they multiply into full rejected batches. This is especially valuable if you’re training new staff or scaling your output.
Pro Tip: Tape a laminated settings card directly to your heat press. Include your verified temperature, dwell time, and pressure level for each garment type you regularly run. Eliminating the guesswork at this stage alone can cut press-related rejects by a significant margin.
There are also meaningful gains available at the speed level. Increasing DTF production speed doesn’t require new equipment — it usually requires better scheduling, batching similar jobs together, and keeping your workspace organized so you’re not hunting for materials mid-run.
Solving common production issues
Even with strong processes, production issues can arise — here’s how to address the most persistent ones. Knowing the root cause of each problem lets you fix it at the source instead of just treating symptoms.
| Problem | Likely cause | Solution |
|---|---|---|
| Color shift or fading | Wrong ICC profile or low ink quality | Recalibrate color profile, check ink freshness |
| Black loss | Incorrect temperature or dwell time | Set press to 170°C/10s, verify with thermometer |
| Contamination or marks | Foreign particles on film or platen | Clean platen before each run, store film properly |
| Poor wash durability | Undercured powder or weak adhesive | Audit curing stage, check powder freshness |
| Peeling edges | Insufficient pressure or too-short dwell | Increase dwell time slightly, check platen pressure |
The three issues that most consistently erode profit margins are color inconsistency, loss of deep blacks, and contamination. Each has a traceable cause.
Quick-reference fixes:
- Run a nozzle check pattern at the start of every print session to catch clogs before they ruin a run
- Calibrate your heat press thermometer monthly — platens drift over time
- Replace ink that’s been open for more than 60 days, even if it looks normal
- Keep your film sealed in its original packaging until use to prevent humidity damage
- Wipe down the heat press platen with a lint roller before each pressing session
Using a dedicated DTF troubleshooting guide gives you a systematic way to isolate whether a problem is in your printer, your press, or your materials — rather than just swapping things out randomly and hoping for improvement.
Critical reminder: Temperature is not a detail — it’s the dominant variable in your entire transfer process. A press running 10°C too hot or too cold will produce consistently bad results no matter how perfect your artwork or ink are. Studies confirm that 170°C with a 10-second dwell minimizes color change, black loss, and contamination in DTF transfers.
If you’re dealing with recurring issues despite following standard settings, your DTF transfer troubleshooting process should start with temperature verification, because it rules out or confirms the most common root cause before you start chasing secondary variables.

Verifying and maintaining quality standards
After solving issues, ensure lasting success by making quality checks part of your routine. Ad-hoc quality checks miss patterns that only become visible over time. A structured verification process turns good production days into consistent production.
Batch inspection checklist:
- Visual check: Examine each transfer under consistent lighting for color accuracy, edge sharpness, and visible contamination or debris before pressing.
- Color comparison: Hold a printed sample next to a reference print or your digital proof. Significant color drift signals a printer calibration or ink issue.
- Adhesion spot check: Press a test transfer onto a scrap garment from the same fabric run. Peel the film, then attempt to lift the transfer edge with your fingernail. Solid adhesion means your press settings are correct.
- Wash test: Run a finished garment through a standard home wash cycle (cold water, tumble dry low) after production. Check for peeling, cracking, or color fade before committing to a large client order.
- Record your results: Log the date, garment type, ink batch number, powder lot, heat press temperature reading, and any anomalies. Even a simple spreadsheet gives you data to identify trends.
Pro Tip: Keep a physical sample board in your workspace. After each production run, press a small test transfer onto fabric and attach it to the board with the date and settings written on it. After a few months, you’ll have a visual record that shows drift in quality before it becomes a customer complaint.
Consistent DTF color accuracy depends on more than printer settings. Ink aging, film lot variation, and even ambient humidity in your workspace all contribute. Tracking these variables over time lets you predict problems instead of reacting to them.
Wash-fastness is a particularly important quality dimension if your customers are decorating athletic wear, workwear, or any garment that will see frequent laundering. A print that looks great on day one but fades or cracks after five washes is a warranty claim and a reputation hit. Documenting your test wash results per ink and powder batch gives you evidence that your process is reliable and helps you communicate confidently with clients.
Research confirms that press settings at 170°C/10 seconds are the experimentally validated baseline for minimizing the three most common quality failures. Build that into your standard operating procedure and verify it regularly rather than assuming your equipment stays calibrated over time.
A practical take: Why process discipline beats expensive upgrades
Here’s an opinion that many equipment vendors won’t tell you: the majority of small DTF shops that struggle with inconsistent quality don’t need a new printer. They need better habits.
It’s tempting to believe that a newer machine will fix wash failures or color drift. Sometimes that’s true. But far more often, the problem is an unmeasured heat press, an undocumented workflow, or ink that’s been sitting too long. These are process problems, and process problems don’t go away just because you spend money on hardware.
Shops that standardize their workflow — fixed settings, documented checklists, regular calibration — see fewer rejects and produce more profit per hour than shops chasing the latest equipment release. The math is simple: a 5% reduction in rejects on a 200-shirt run is meaningful money. That kind of gain comes from discipline, not from new gear.
DTF’s real advantage is its repeatability when the process is tight. DTF cost efficiency only materializes when you’re not burning through film and powder on rejects. Build the habits first. Upgrade equipment when your process is already running well and volume demands it.
Optimize your DTF results with Transfer Kingz
Process optimization gets you most of the way there, but the quality of your source materials sets the ceiling on what’s possible. Inconsistent transfers from low-grade suppliers put a cap on how good your final prints can be, no matter how disciplined your workflow is.

Transfer Kingz provides premium DTF transfers that are print-ready and built to the quality standards your process deserves. Whether you’re running a one-person shop or scaling a production floor, our transfers are tested for color accuracy, wash durability, and clean adhesion. If you’re in the area, our DTF transfers Dallas and DTF transfers Texas services offer fast local access to professional-grade product. You can also walk through options and get hands-on guidance at our Print Point location. Let’s build something great together.
Frequently asked questions
What is the ideal heat press setting for DTF transfers?
The optimal setting is 170°C for 10 seconds of dwell time, which experimentally minimizes color change, black loss, and contamination across fabric types. Always verify your press with an infrared thermometer since dial readings can drift.
How can I speed up my DTF production process?
Batch similar jobs together, maintain a clean workspace, and use a quality checklist at each stage to prevent costly rework from slowing you down. Consistent settings also eliminate the time lost to troubleshooting variable results.
What are the main causes of black loss in DTF prints?
Incorrect temperature and dwell time are the leading causes — black loss decreases significantly when pressing at the experimentally validated 170°C/10-second setting. Ink age and nozzle condition are secondary factors worth checking if the issue persists.
How often should I check the quality of my DTF prints?
Inspect every batch visually before pressing, run a wash test per new ink or powder lot, and keep records so you can spot quality drift before it becomes a customer problem.
0 comments