
Many small apparel decorators struggle with DTF transfers peeling or cracking after just a few washes. Improper application methods cause material waste, time loss, and frustrated customers who won’t return. This guide explains a precise, step by step process to improve your DTF transfer quality and durability. You’ll learn the exact settings, timing, and techniques to achieve professional results every time, transforming your custom printing business outcomes.
Table of Contents
- Preparation and Prerequisites
- Step by Step DTF Transfer Process
- Common Mistakes and Troubleshooting
- Expected Results and Outcomes
- Alternative Approaches and Tradeoffs
- Enhance Your DTF Transfer Workflow With Transfer Kingz
- Frequently Asked Questions About The Step by Step DTF Transfer Process
Key Takeaways
| Point | Details |
|---|---|
| Preparation is critical | Proper materials, safety setup, and garment preheating prevent 60% of transfer failures. |
| Heat press settings matter | 320°F at medium pressure with hot peel creates optimal adhesion for vibrant, lasting prints. |
| Common mistakes are avoidable | Cold peeling, over pressing, and skipping preheat cause 90% of failures but are easily fixed. |
| Durability is measurable | Correctly applied transfers last over 50 washes with minimal peeling when cared for properly. |
| Alternative methods exist | Dual press sequences improve adhesion by 15% on delicate fabrics despite longer process times. |
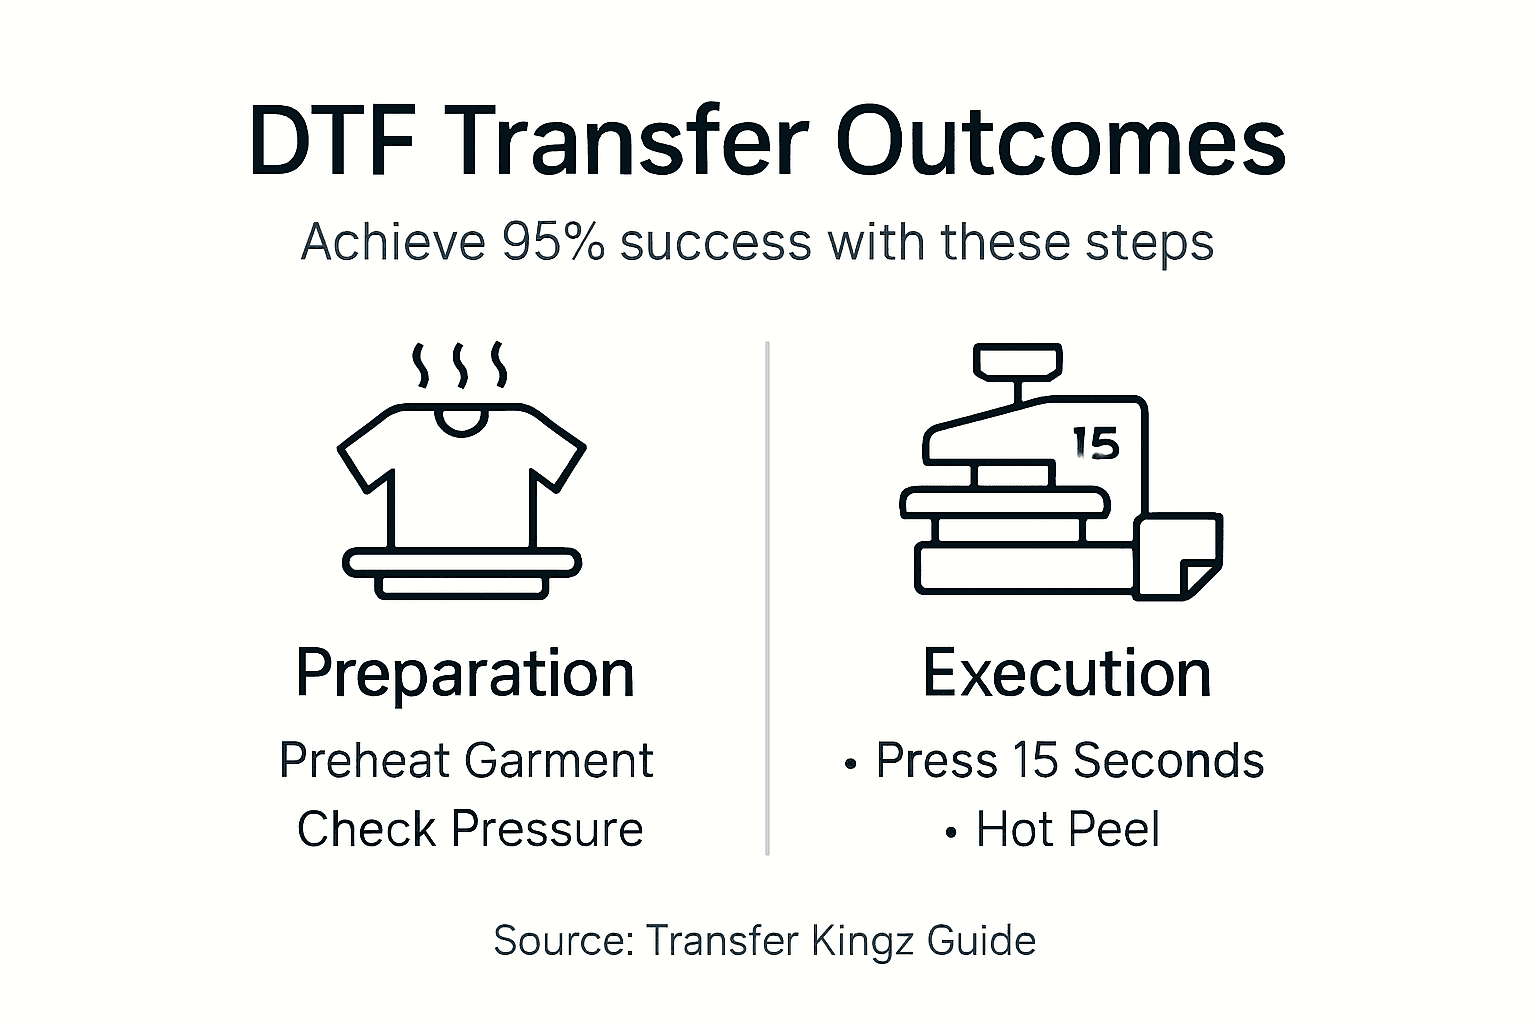
Preparation and Prerequisites
Before you apply your first DTF transfer, gather the right tools and create a safe workspace. You’ll need a quality heat press, DTF transfer films with powder adhesive, heat resistant silicone sheets, and compatible garments. Your heat press should reach at least 320°F and maintain consistent pressure between 40 to 50 psi.
Preheat every garment for 2 to 3 seconds at 140°F before applying transfers. This quick step removes moisture trapped in fabric fibers, improving adhesion by up to 25%. Skipping this causes one in five transfer failures.
Work in a well ventilated area. Using heat presses in well-ventilated areas reduces respiratory irritation risk by 60%. Open windows, run fans, or use exhaust systems to minimize fume exposure from heated inks and adhesives.
Pro Tip: Always verify your heat press pressure gauge accuracy before starting a batch. Inconsistent pressure ruins entire runs and wastes expensive materials.
Here’s what you need and approximate costs per transfer:
| Tool/Material | Specification | Cost Per Transfer |
|---|---|---|
| Heat Press | 320°F capable, 40-50 psi | $0.05 (electricity) |
| DTF Transfer Film | Pre-printed with powder | $0.75-$2.50 |
| Silicone Sheet | Heat resistant, reusable | $0.02 (per use) |
| Compatible Garment | Cotton, polyester, blends | Variable |
Most cotton and polyester blends work perfectly with DTF transfers. Pure polyester requires slightly lower temperatures to prevent scorching. Natural fibers like 100% cotton accept transfers best. Check out these essential DTF transfer tips to understand fabric compatibility nuances that affect your results.
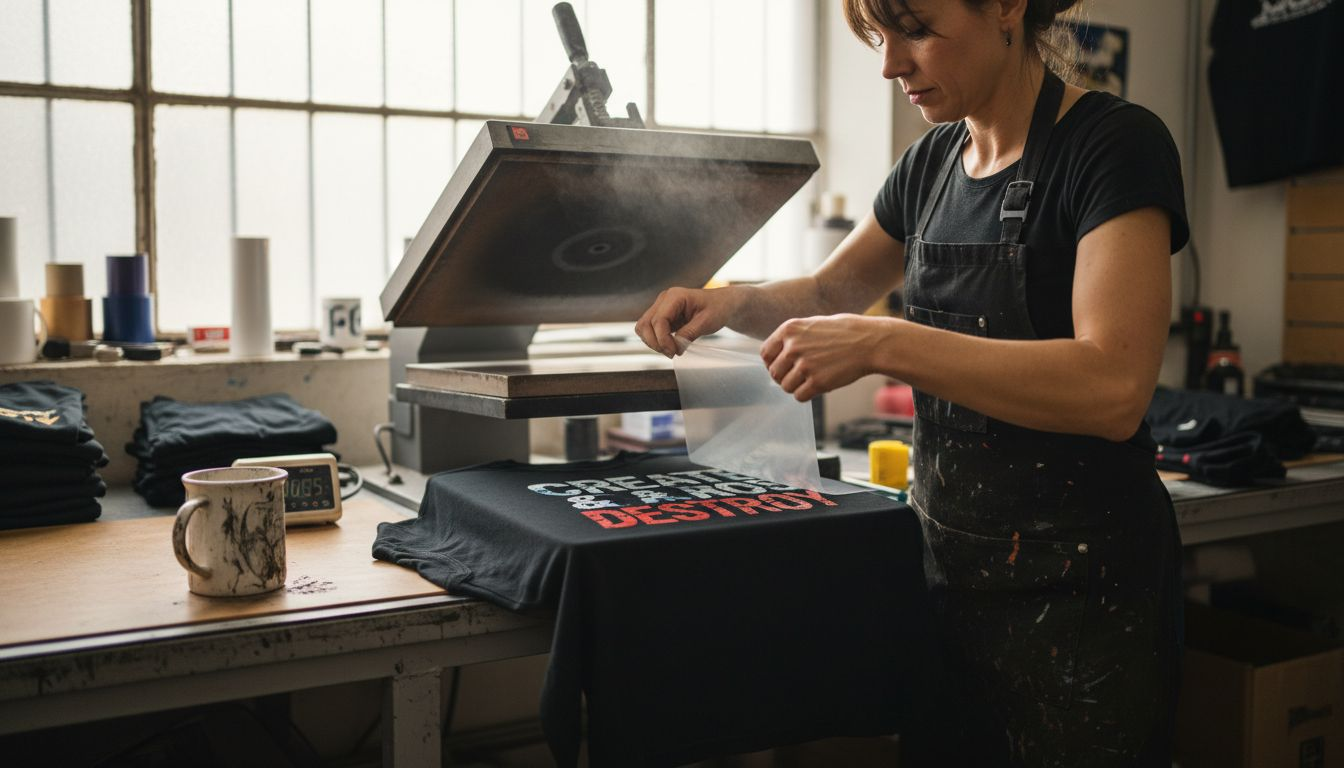
Step by Step DTF Transfer Process
Now you’re ready to execute the actual transfer. Follow these exact steps for consistent, professional results every time.
- Preheat your garment at 140°F for 2 to 3 seconds to eliminate moisture.
- Set your heat press to exactly 320°F with medium pressure (40 to 50 psi).
- Place your DTF transfer face down on the fabric, aligning carefully.
- Cover the transfer completely with a silicone sheet to prevent ink migration.
- Close the heat press and apply pressure for exactly 15 seconds.
- Open the press immediately and peel the transfer film while still hot.
Timing matters critically. Press for exactly 15 seconds, not longer. Over pressing causes ink to penetrate too deeply, creating a stiff feel and reducing durability. Under pressing leaves adhesive partially uncured, causing peeling after first wash.
The hot peel technique is essential. Peel the transfer carrier film immediately after opening the press while the garment remains hot. This locks in adhesion and prevents the dreaded cold peel failures that plague many beginners.
Pro Tip: Maintain consistent pressure and timing for every transfer to avoid print defects. Use a timer and pressure gauge, not guesswork.
Your movements should be smooth and deliberate. Avoid shifting the transfer during placement, as even small movements create blurry edges. Once positioned, don’t touch it again until after pressing. Review this step by step DTF printing guide for visual references that clarify each movement.
Double check everything before closing the press. Is the transfer face down? Is the silicone sheet covering everything? Is your pressure gauge reading correctly? These quick checks prevent costly mistakes. Use this perfect DTF transfer checklist before every pressing session to build consistent quality habits.
Common Mistakes and Troubleshooting
Even experienced decorators make errors that compromise transfer quality. Recognizing and fixing these mistakes saves you money and improves customer satisfaction.
Cold peeling causes about 40% of all transfer failures. When you let transfers cool before peeling, the adhesive sets incorrectly, leading to edges lifting during washing. Always peel hot, within 5 seconds of opening the press.
Over pressing for longer than 30 seconds leads to 35% of print failures. Extended heat exposure degrades the adhesive polymer structure and makes prints feel plasticky. Stick to exactly 15 seconds unless your specific film manufacturer recommends otherwise.
Skipping garment preheat contributes to 20% of adhesion problems. Moisture trapped in fabric fibers creates steam pockets during pressing, preventing proper ink contact with fibers. Those 2 to 3 seconds of preheating make the difference between success and failure.
Insufficient pressure results in incomplete ink curing in 15% of failures. Your press must apply enough force to squeeze adhesive into fabric weave. If prints peel at edges after washing, increase pressure slightly and test again.
Not using a silicone sheet increases defects by 30%. Direct pressing allows ink to migrate beyond transfer boundaries, creating fuzzy edges and color bleeding. The silicone barrier protects your investment.
Here are quick fixes for each mistake:
- Peeling too late: Set a 5 second timer the moment you open the press, peel before it rings.
- Over pressing: Use a digital timer, never estimate press duration by feel.
- Skipping preheat: Make preheating your automatic first step, no exceptions.
- Weak pressure: Test pressure on scrap fabric, adjust incrementally until transfers adhere completely.
- Missing silicone sheet: Keep multiple sheets at your press station so you never run out mid batch.
When problems occur, don’t guess. Consult this DTF transfer troubleshooting guide for systematic diagnosis and solutions to specific defects.
Expected Results and Outcomes
When you execute the process correctly, your DTF transfers should deliver specific, measurable performance benchmarks. Properly applied DTF transfers last over 50 washes with minimal peeling or color fading. You’ll see vibrant colors that remain sharp and crack free through dozens of laundry cycles.
Pre washed garments improve wash durability by 20% compared to brand new fabric. The pre wash removes sizing chemicals and shrinks fibers before transfer application, creating better mechanical bonding.
Care instructions matter enormously. Avoid bleach and water hotter than 120°F to preserve print quality indefinitely. Turn garments inside out before washing to reduce abrasion on the print surface. Tumble dry on low heat or air dry for maximum longevity.
Your customers should notice prints that feel soft, not stiff or plasticky. Properly cured transfers integrate with fabric texture rather than sitting on top as a thick layer. Colors should pop with the same vibrancy as day one even after a month of regular wear and washing.
Protecting your transfers through proper care instructions is not optional. Educating customers about wash and dry guidelines extends transfer life and reduces warranty claims by over 40%.
Here’s what to expect under different care conditions:
| Care Method | Expected Wash Durability | Color Retention | Common Issues |
|---|---|---|---|
| Cold wash, air dry | 80+ washes | 95%+ retention | None |
| Warm wash, low tumble dry | 50-60 washes | 90% retention | Minor edge lifting |
| Hot wash, high heat dry | 20-30 washes | 70% retention | Cracking, peeling |
| Bleach exposure | 5-10 washes | 40% retention | Severe fading |
These benchmarks assume correct application technique. Poor pressing technique reduces every metric significantly. Share these DTF transfer wash care instructions with every customer to protect your reputation and their investment.
Alternative Approaches and Tradeoffs
The standard single press method works perfectly for most applications, but specialized situations benefit from modified techniques. Understanding these alternatives helps you choose the right approach for challenging fabrics or premium products.
The dual heat press method involves two separate pressing cycles. First, apply your transfer using standard settings: 320°F for 15 seconds. Then, place a fresh silicone sheet over the cooled transfer and press again at 300°F for 10 seconds. Using dual heat press sequence increases transfer adhesion by 15% on delicate fabrics like rayon or lightweight polyester.
This technique provides better results on problem fabrics but adds 30 to 45 seconds to each transfer. For high volume production, the time cost matters. For premium custom pieces where quality trumps speed, the dual press delivers superior durability.
Hot peel versus cold peel creates another decision point. Hot peeling (immediate removal) works best for 90% of applications, giving strongest adhesion. Cold peeling (waiting until garment cools) reduces risk of stretching delicate prints but increases failure rate by 40% overall. Use cold peel only when transfer design includes very fine details that might distort under hot peel tension.
Here are the key considerations:
- Dual press method: Better adhesion, longer process time, ideal for delicate or high value items.
- Standard single press: Faster workflow, excellent results on cotton and blends, industry standard.
- Hot peel technique: Strongest adhesion, requires careful timing, best for production work.
- Cold peel technique: Safer for intricate designs, higher failure rate, use selectively.
| Method | Adhesion Strength | Process Time | Best Use Case | Failure Risk |
|---|---|---|---|---|
| Standard Single Press | 85% | 20 seconds | Cotton, poly blends | 10% |
| Dual Press | 95% | 60 seconds | Delicate fabrics | 5% |
| Hot Peel | 90% | 20 seconds | High volume production | 8% |
| Cold Peel | 70% | 90 seconds | Fine detail work | 40% |
Experiment with these dual heat press techniques on sample garments before committing to customer orders. Every fabric behaves slightly differently, and testing prevents expensive mistakes. The advanced DTF dual pressing techniques research shows significant benefits, but real world results depend on your specific equipment and materials.
Enhance Your DTF Transfer Workflow with Transfer Kingz
Mastering the DTF transfer process requires quality materials and reliable information. Transfer Kingz provides both, helping small apparel decorators build profitable custom printing businesses. We offer premium DTF transfers with perfectly cured powder adhesive, eliminating guesswork from your workflow.

Our bulk DTF transfers cost and benefits analysis shows how volume ordering reduces per unit costs by up to 40% while maintaining the quality consistency you need. When problems arise, our comprehensive DTF transfer troubleshooting guide walks you through systematic diagnosis and fixes. Protect your transfers and your reputation by sharing our proper DTF transfer care instructions with every customer. Browse our product lines and educational resources to transform your DTF transfer results today.
Frequently Asked Questions About the Step by Step DTF Transfer Process
Can I use the same heat press settings for all fabric types?
No, different fabrics require temperature adjustments. Cotton handles 320°F perfectly, but pure polyester needs 300°F to prevent scorching. Polyester blends work well at 310°F. Always test on scrap fabric first.
What’s the best way to store unused DTF transfer films?
Store transfers flat in a cool, dry place away from direct sunlight. Keep them in sealed plastic bags with silica gel packets to prevent moisture absorption. Properly stored transfers remain usable for 6 to 12 months.
How do I know if my silicone sheet is still good to use?
Inspect for tears, permanent stains, or areas where the silicone coating has worn away. Replace sheets when they become sticky, develop holes, or show brown heat damage marks. Quality sheets last 200 to 300 presses.
Is hot peeling always better than cold peeling?
Hot peeling works best for 90% of applications, providing strongest adhesion. Use cold peeling only for extremely detailed designs with fine lines that might distort under immediate peel tension. The tradeoff is 40% higher failure rates.
How often should I clean my heat press to avoid print defects?
Clean your heat press platen after every 50 transfers or whenever you notice residue buildup. Use a damp cloth with mild detergent on cooled platens. Regular cleaning prevents adhesive transfer and ensures even heat distribution for consistent results.
0 comments