
Getting vibrant, durable prints on textiles is harder than it looks. Screen printing cracks, sublimation limits you to polyester, and vinyl peels after a few washes. Direct-to-Film (DTF) transfers solve all three problems at once, giving you full-color, wash-resistant prints on virtually any fabric. Whether you run a small custom apparel shop or print for fun on weekends, this guide walks you through every stage of the DTF process, from understanding the technology to troubleshooting real-world issues and caring for finished garments.
Table of Contents
- What is DTF and why is it ideal for textiles?
- Essential materials and tools for DTF transfers
- Step-by-step DTF application process for textiles
- Heat press settings by fabric type
- Troubleshooting common DTF transfer issues
- How to verify and care for your finished prints
- Print confidently with expert DTF transfer support
- Frequently asked questions
Key Takeaways
| Point | Details |
|---|---|
| DTF suits most textiles | Direct-to-Film transfers allow vibrant, durable prints on a wide range of fabric types. |
| Correct settings are crucial | Adjust heat, time, and pressure for the fabric you’re using to avoid common flaws. |
| Troubleshooting prevents waste | Knowing how to fix adhesion, cracking, or fading issues saves costly mistakes. |
| Tester prints improve results | Always test on scrap fabric before doing full production to fine-tune your process. |
| Aftercare extends print life | Proper washing and storage keep DTF prints vibrant and long-lasting. |
What is DTF and why is it ideal for textiles?
DTF stands for Direct-to-Film printing. Instead of printing directly onto a garment, you print your design onto a special PET (polyethylene terephthalate) film, coat it with adhesive powder, cure it, and then heat press the finished transfer onto fabric. The result is a soft, flexible print that bonds tightly to the fibers.
What makes DTF stand out is its versatility. You can apply it to cotton, polyester, nylon, denim, canvas, and blended fabrics without changing your core workflow. Colors stay vivid because the process uses a white underbase layer that makes every color pop, even on dark garments. Fine details like thin lines and small text reproduce cleanly because the film holds the ink precisely before transfer.
Here is a quick look at the core benefits:
- Works on virtually any fabric type and color
- Produces vibrant, full-color prints with no color limits
- Handles intricate designs and fine details with ease
- Delivers soft, flexible prints that move with the fabric
- No minimum order requirements, making it perfect for small runs
- Faster setup than screen printing, with no screens or films to burn
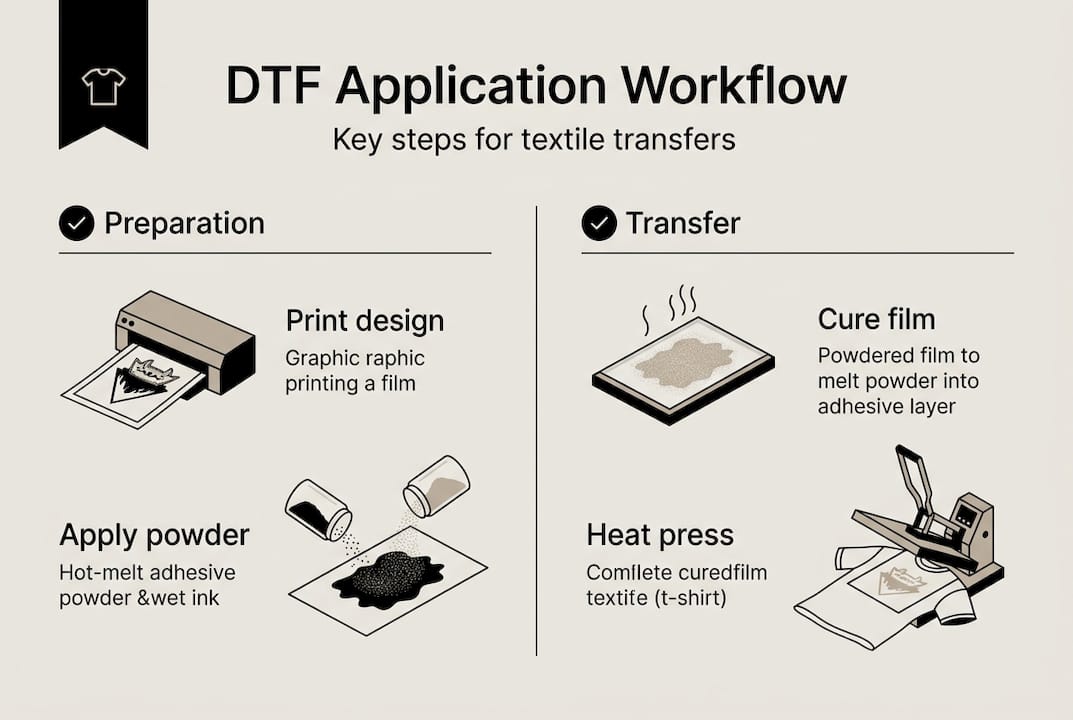
Following DTF printing best practices from the start saves you time and materials. As the DTF application guide explains, the process covers printing on PET film with a white underbase for dark fabrics, applying adhesive powder to wet ink, curing the powder, pre-pressing fabric, heat pressing the transfer, peeling, and an optional post-press step.
Key process overview: Print design on PET film, apply adhesive powder to wet ink, cure, pre-press fabric, heat press, peel, and optionally post-press for extra durability.
Essential materials and tools for DTF transfers
With the advantages of DTF clear, here is what you will need to get started.
| Tool or material | What it does | Selection tip |
|---|---|---|
| PET film | Holds the printed design before transfer | Choose film rated for your printer type |
| DTF inks (CMYK + white) | Creates the full-color image and underbase | Use pigment-based inks for best adhesion |
| Adhesive powder (hot melt) | Bonds the transfer to fabric during pressing | Fine-grain powder works best for detail |
| Curing oven or hot air gun | Melts and sets the adhesive powder | Oven gives more even results for production |
| Quality heat press | Applies heat and pressure to bond transfer | Swing-away presses offer better access |
| Garments or fabric | The final substrate for your design | Pre-wash to remove sizing agents |
| Scissors or tweezers | Trim and handle film precisely | Sharp scissors prevent ragged edges |
As outlined in the DTF application guide, printing on PET film, applying adhesive powder to wet ink, and curing the powder are the three foundational steps that everything else depends on. Getting these right means your transfer will bond cleanly and last through repeated washes.
Use this DTF transfer checklist to make sure you have everything in place before you start a production run.
Pro Tip: Always keep a Teflon sheet or parchment paper between your heat press platen and the transfer. It prevents sticking, protects the film, and gives you a more even heat distribution across the design.
Step-by-step DTF application process for textiles
With all equipment on hand, here is how to execute the DTF process from start to finish.
- Print your design onto PET film. Mirror your artwork before printing. For dark fabrics, your printer lays down a white underbase automatically.
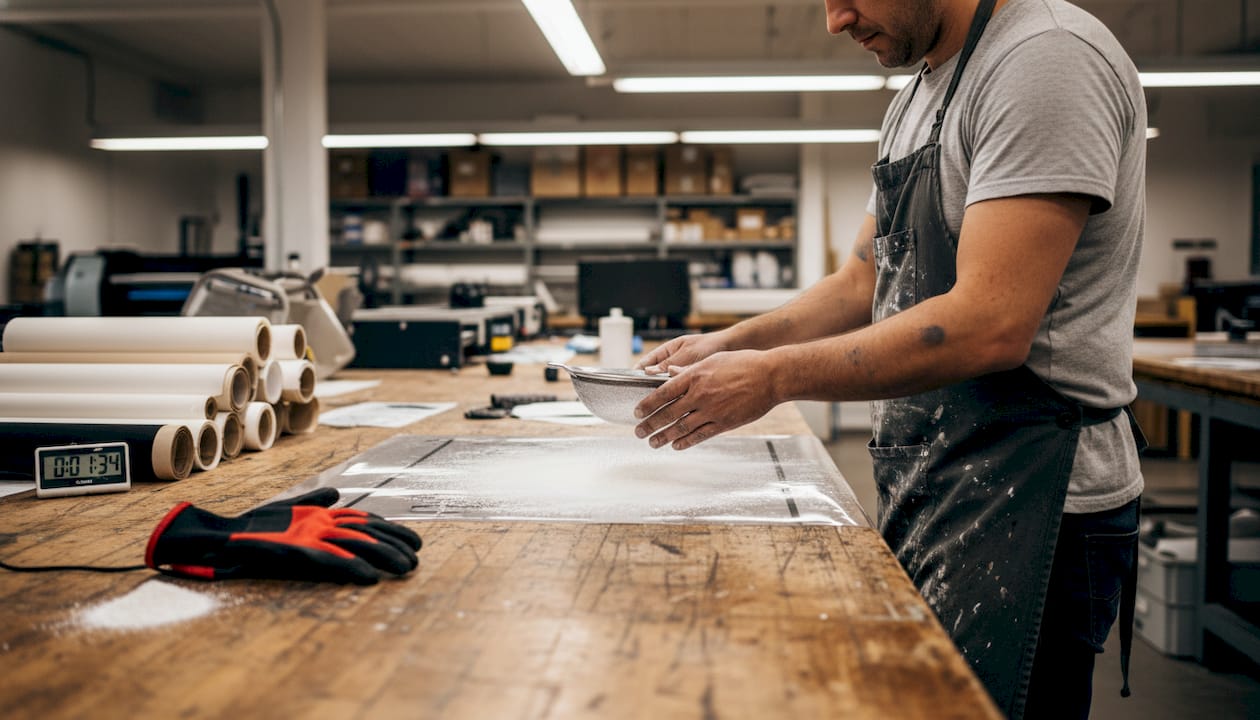
- Apply adhesive powder while ink is still wet. Shake hot-melt powder evenly over the printed surface, then tap off the excess. Work quickly so the ink does not dry before the powder sticks.
- Cure the adhesive powder. Run the film through a curing oven at around 250 to 300°F (120 to 150°C) until the powder melts into a smooth, glossy layer. A hot air gun works for small batches.
- Pre-press your fabric. Place the garment on the heat press and press for 3 to 5 seconds to remove moisture and wrinkles. This step dramatically improves adhesion.
- Heat press the transfer onto the fabric. Position the film design-side down, apply the correct temperature and pressure for your fabric type, and press for the recommended time.
- Peel the film. Hot-peel films come off immediately after pressing. Cold-peel films need to cool completely first. Check your film specs before you pull.
- Optional post-press. Cover the print with parchment paper and press again for 5 to 10 seconds. This smooths the surface and locks in adhesion.
The full DTF application process is well documented, and following the DTF transfer workflow step by step reduces errors significantly. The DTF application guide confirms that these steps, from PET film printing through post-press, are the standard for consistent, durable results.
| Method | Pros | Cons |
|---|---|---|
| Oven curing | Even heat, consistent results | Requires equipment investment |
| Hot air gun curing | Low cost, portable | Uneven if not careful |
| Hot peel film | Faster workflow | Less forgiving if peeled wrong |
| Cold peel film | Cleaner finish, more control | Adds wait time between steps |
Pro Tip: Always test-press on a scrap piece of the same fabric before running your full order. A two-minute test saves you from ruining an entire batch.
Heat press settings by fabric type
With the basic process down, it is time to fine-tune your settings based on the fabric you are working with.
| Fabric type | Temperature | Time | Pressure | Notes |
|---|---|---|---|---|
| 100% cotton | 300 to 325°F (150 to 165°C) | 10 to 15 seconds | Medium | Most forgiving fabric for DTF |
| 100% polyester | 270 to 290°F (130 to 145°C) | 8 to 12 seconds | Light to medium | Risk of dye migration at high temps |
| Cotton/poly blends | 290 to 310°F | 10 to 15 seconds | Medium | Test first, results vary by blend ratio |
| Performance fabrics | 270 to 285°F | 8 to 10 seconds | Light | Moisture-wicking fabrics are heat-sensitive |
According to the DTF temperature guide, heat press settings vary significantly by fabric, and always testing before a full run is essential for consistent results.
Fabric-specific precautions to keep in mind:
- Remove all moisture from the garment with a pre-press before applying the transfer
- Stretch-prone fabrics like spandex blends need lighter pressure to avoid distortion
- Wrinkles under the transfer cause uneven adhesion and visible texture in the final print
- Performance fabrics are especially prone to dye migration, so keep temperatures conservative
Warning: Polyester dye migration is a real risk. When heat is too high, the dye in the fabric bleeds into your transfer and discolors the print. Stay under 145°C and always run a test press on polyester garments before committing to a full run.
For a deeper look at applying DTF transfers to different fabric types, the process details are worth reviewing before you start a new fabric category.
Troubleshooting common DTF transfer issues
Even with best practices, real-world printing sometimes brings surprises. Here is how to fix them fast.
- Poor adhesion: The transfer lifts or does not stick fully. Increase temperature, pressure, or press time. Make sure you pre-pressed the fabric to remove moisture.
- Cracking or peeling after washing: Usually caused by under-curing or over-curing the adhesive powder, or peeling the film at the wrong time. Check your curing temperature and peel method.
- White ink clogging: White DTF ink settles fast. Shake your ink cartridges or bottles daily and run a nozzle check before every print session.
- Fading colors: Often a sign of an insufficient white underbase or incomplete curing. Increase your underbase density in your RIP software settings.
The DTF printing troubleshooting guide confirms that poor adhesion responds to increased temp, pressure, and time, while cracking and peeling trace back to curing errors or wrong peel timing. For more detailed fixes, troubleshooting DTF issues and DTF troubleshooting tips are solid resources to bookmark.
Pro Tip: Keep a simple log for every print run. Note the fabric type, temperature, time, pressure, and peel method. When something goes wrong, your log tells you exactly what to adjust instead of guessing.
How to verify and care for your finished prints
Once your print cools, it is not finished until it is inspected and properly cared for.
Run through this inspection checklist after every transfer:
- Check the edges. Lift the garment and look at the print perimeter. Edges should be clean and fully bonded with no lifting corners.
- Stretch test. Gently stretch the fabric in multiple directions. A well-bonded DTF print flexes without cracking or separating.
- Color check. Compare the finished print to your original design file. Colors should be vivid and consistent across the entire image.
- Surface feel. Run your finger across the print. It should feel smooth and slightly soft, not rough or raised unevenly.
For long-term durability, the DTF application guide notes that proper peeling technique and an optional post-press step are key to prints that hold up over time. Use this DTF transfer checklist for designers to build a consistent quality control routine.
Aftercare tips to make your prints last:
- Wash garments inside out in cold or warm water, never hot
- Use a mild detergent without bleach or fabric softener
- Avoid high-heat dryer settings; air dry or tumble dry on low
- Store printed garments flat or folded, not hung for long periods, to prevent stretching around the print area
- Do not iron directly on the print; use a pressing cloth if needed
Print confidently with expert DTF transfer support
Mastering DTF application takes practice, but you do not have to source everything from scratch or figure it out alone. Whether you are printing your first custom tee or scaling up to hundreds of units a week, working with a trusted transfer partner makes the whole process faster and more consistent.

Transfer Kingz supplies high-quality transfers built for exactly the kind of results this guide describes: vivid colors, clean edges, and prints that hold up wash after wash. If you are based in the region, DTF transfer services in Dallas and DTF transfers in Texas are available with fast turnaround and no minimum order requirements. Upload your artwork, build a gang sheet, and get professional transfers delivered ready to press.
Frequently asked questions
Can I use DTF transfers on any fabric type?
DTF works on most fabrics, including cotton, polyester, blends, and performance materials. The key is adjusting your heat press settings to match the specific fabric you are pressing.
What causes DTF prints to peel after washing?
Peeling usually comes down to under- or over-curing the adhesive powder, incorrect peel timing, or insufficient pressure during pressing. The DTF troubleshooting guide recommends checking all three variables before reprinting.
How do I prevent dye migration on polyester?
Keep your heat press temperature under 145°C and use light pressure. Always run a test press on a sample garment first, since polyester dye migration varies by brand and fabric weight.
Is DTF suitable for detailed and intricate prints?
Yes. DTF is one of the best methods for fine detail work. The PET film holds ink precisely, and the white underbase layer ensures colors stay accurate even on dark fabrics.
How should I care for DTF-printed garments?
Wash inside out with mild detergent in cold or warm water, and avoid high-heat drying. Proper post-press technique during production also plays a big role in long-term durability.
0 comments